You can write and format text, create tables, embed images and videos, insert links, and more with the content editor.
When you create or edit discussions, blog posts, documents, or other content, you use the content editor built into Jive. You can use either the icons in the interface or keyboard shortcuts to perform basic text editing operations such as cutting, pasting, undoing, and text formatting. The editor includes many of the standard features of other word processing programs. Here are some features of the Jive content editor you may want to explore:
- In-line @mentioning
- Tables of contents
- Tables
- Spell checker
- Code syntax highlighting
In-line @mentioning
To @mention someone while you are typing in the content editor, type the @ symbol (or click the @ button if it is available). A search dialog opens and suggests possible matches. To narrow matches, use an underscore (_) as a space. For example, @Mike_D would match the Mikes whose last name begins with "D." Select the correct match from the list and note the new link in the content editor. For more about @mentioning, see Shout out to people, places, and things.
Adding a Table of Contents
The content editor includes a feature that automatically generates a hierarchical table of contents based on the headings in your content. When you insert the table of contents, the editor looks at the headings your content uses, including their levels (Heading 2, Heading 3, and so on). Based on the heading levels, the editor creates links to the headings, indenting the links at similar levels.
To insert the table of contents, click . While you're editing the content, the presence of the table of contents will appear as an icon like so:
In the saved or published version of the content, the icon will be replaced with a hierarchical list of links to headings in your content.
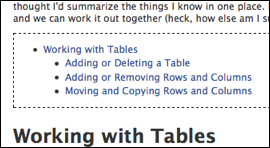
Working with Tables
The content editor's table feature allows you to create and manipulate tables. Create a new table by clicking the table icon and selecting the number or rows and columns you want. Once you've got the table in place, use the gear icon to move around or add/remove rows and columns. To format individual cells, rows, or columns, click in a cell and when you see the Edit: Table icon, click it and then select the item you want to format (a cell, row, or column). You can designate and format headers, change the color of text, lines, and background, and customize many other settings. Note that when you change the header setting while making changes in a column, only the header for that column will change, not all of the headers. In addition, changing the color of text using Table: Format changes the default text color setting for the selected cell, row, or column. To make text color changes that you don't want to apply as a default to the cell, row, or column, use the text color icon in the editor's toolbar. When you are finished formatting your table, simply click away from it and continue editing your document.
Using the Spellchecker
The content editor includes a spellchecker that you turn on when you want to check spelling. When you're ready to check the spelling in your document, click the spellchecker button. Misspelled words will be underlined in red. Click a misspelled word to view suggested alternate spellings and scroll down to select the best match. Note that the spellchecker does not check spelling as you type. You must turn it on or off by clicking the spellchecker button. After you have made corrections, click the button again to recheck spelling.
How can I use HTML in my content?
The content editor's HTML feature allows you to edit your document in HTML. Click the HTML link in the editor's toolbar when you want to write directly in HTML. When you're finished, you can toggle back to the default editor view by clicking Show Full Editor.
Some kinds of HTML markup can cause the site to be less secure. For this reason, certain HTML tags aren't supported by default. When you use these tags in the code macro, Jive will remove them before displaying the content. You can include them and they'll be saved, but they won't render when someone views your content. Here's a list of what's not supported:
Tags: <embed>, <html>, <head>, <iframe>, <link>, <meta>, <object>, <script>, <style>
Attributes: action, class, method, on* (such as onClick), *src*
Code Syntax Highlighting
The content editor's syntax highlighting feature allows you to format programming code so that it renders correctly in the saved and published versions of your document, blog post, or other content. Supported code styles are SQL, XML, Java, and Plain text. To apply the code formatting:
- Select the block of text you want to format, then click the >> button and select the formatting style you want; or,
- Click the >> button and select the formatting style you want, then type your code in the shaded box.
