You can set up moderation for new user registrations if you've set up the application to allow people to register on their own. A community manager or system administrator enables both user registration and moderation for new registration requests.
To set up new user registration moderation:
- Enable user self-registration by going to and select Enabled under "Allow user-created accounts." This allows users to create their own account from the login page. To learn more about the options on this page, see Configuring User Registration.
- On the same page, under "Registration Moderation," select Enabled. This turns on the moderation feature for all new user registrations.
- You can select Only for addresses matching the blacklisted domain list to limit registration moderation to those email address originating only from the domains that you blacklist. Alternatively, you can block registrations entirely from those you list in the blacklist box by selecting Always block registrations from blacklisted domains. To block or moderate all addresses from a domain, use an asterisk before the domain, e.g., *@domain.com.
- Make sure you have designated a Global Moderator(s). The application will send new user registration moderation requests to that user(s) first. If you don't have one, the application will send the request to the Full Access user(s).
Moderating New User Registrations
If you are the moderator for new user registration, you will approve or decline new
registration requests. Here's how it works:
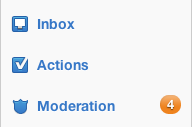
- When someone submits a new registration, you will see an alert on your
Moderation tab in the end user interface. Click it.
- On the Pending Items page, you will see the request (or a list of requests). Click the person's name to view their profile page with the information they entered.
- Then Approve or Reject the registration request. If you reject, you can enter your reason before finishing.