Configuring Slideshow tile-specific settings
To configure settings specific to Slideshow tiles:
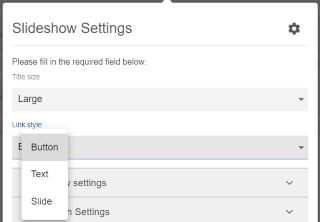
Configuring Slideshow Settings of Slideshow tile
-
Specify Image Overlay settings: Select Title size, Link style (Button, Text, Slide).
-
Set Animation settings using different options available:
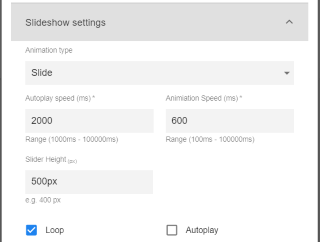
- Animation type: Slide / Fade
- Autoplay speed and Animation Speed
- Slider Height
- Choose Loop or Autoplay
-
Set Navigation Settings of the slides:
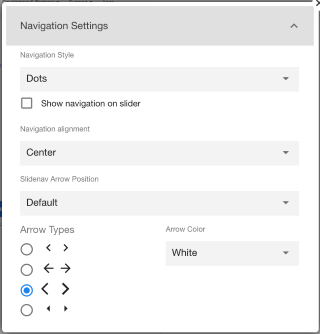
- Navigation Style: None, Dots, Thumbnails
- Navigation Alignment: Left, Center, Right, Justify
- Select Arrow Types to display
- Choose Arrow Color: Light or Dark
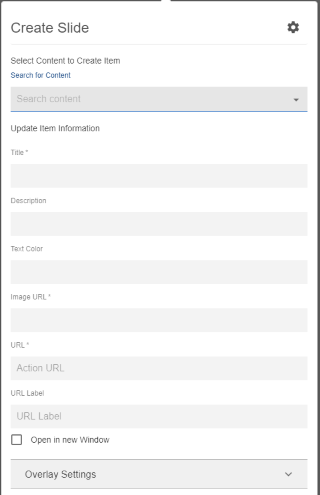
Configuring Manage Slides settings of Slideshow tile
-
Select Create Slide to start creating slides.
-
In the Overlay Settings, provide the following:

- Image Overlay Position (Left, Right, Center, Top, Bottom, None)
- Select Background color using the Color picker
- Specify the Background color opacity
Slideshow tile is configured successfully.