Creating and editing forms with the Forms and Surveys App
Here you can find details on using the Forms and Surveys App.
Forms/Surveys Admin: Can configure App and access all Forms and Survey from all users.
Forms/Surveys Co-author: Can access the App and create, update, delete their own Forms/Survey.
-
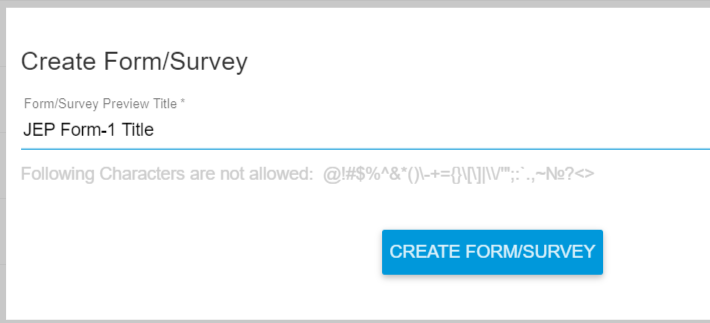
Provide a suitable Title for the new form and click Create Form/Survey.
-
Use the form fields displayed on the top in the subsequent screen to configure the overall form:
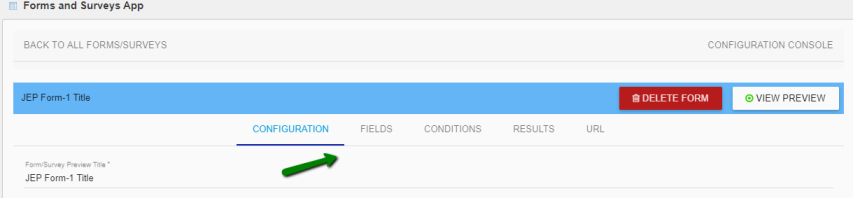
Option Description Configuration tab Provide details here to set the overall configuration of the form. Fields tab Provide the information items (fields) to be displayed on the form. Conditions tab Add conditions, based on which the fields will be displayed on the form. Results tab Displays the inputs provided by the user, after they complete and submit the form. - At any point in time, select Delete Form on the top right corner to remove this form from the app.
- Select View Preview to have a glimpse of the configured form that will be displayed to the user.
-
On the Configuration tab:
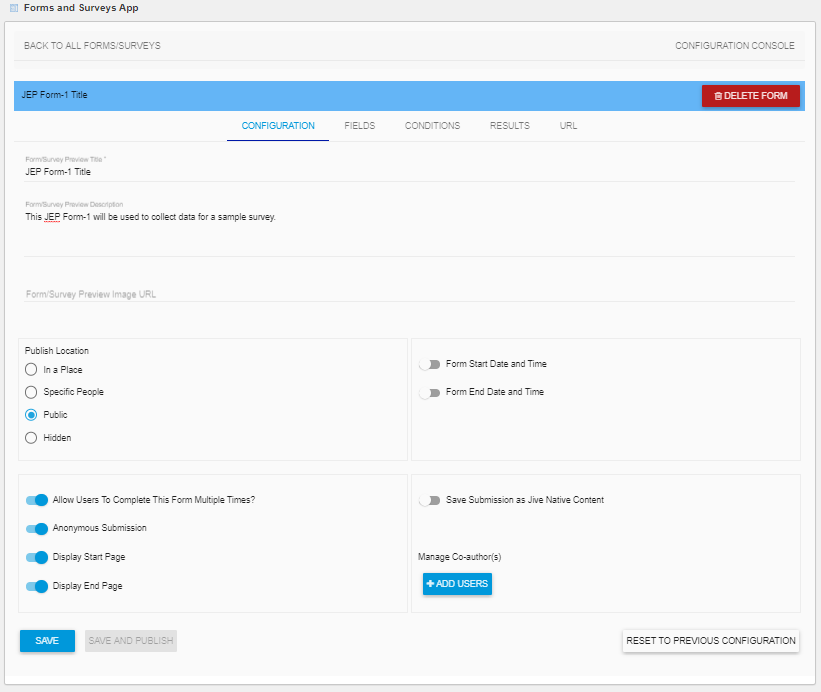
Option Description Form/Survey Preview Description Enter a brief description of this form Form/Survey Preview Image URL Provide the URL for the image to be displayed in the external object (which represents the form) published in a place Publish Location Specify the Place, where the configured form can be viewed - In a Place: Place: Form/Survey will be published as an external object in a Jive place. User can only select a place he/she has access to
- Hidden: Form/Survey will not be published as an external object in a Jive place but can be accessed via direct link by Admins, Authors, and Co-Authors
- Specific People: Form/Survey will not be published as an external object in a Jive place but can be accessed via direct link by Participants (and Admins, Authors, and Co-Authors)
- Public: Form/Survey will not be published as an external object in a Jive place but can be accessed via direct link by any registered user
- Enable/disable the following form elements as required:
Option Description Form Start/End date and time The time period during which the form will be active/valid. Allow users to complete this Form multiple times Allows the author to enable/disable multiple submissions of the Form/Survey. Default: Single submission Anonymous submission If enabled, User details will not be sent when submitting the completed form Display Start/End Pages If disabled, will not display the Welcome and Thank you pages in the form Save submission as Jive native content If enabled: - can save to a selected Place as Document / Blog Post / Question / Discussion
- a TEMPLATE tab also appears on top of the screen along with the other tabs to facilitate the same functionality
Manage Co-authors Select to add users (from a drop-down list), who can also author this form. In addition, the co-authors and their details will be listed below this field. -
On the Fields tab, click Select Field:
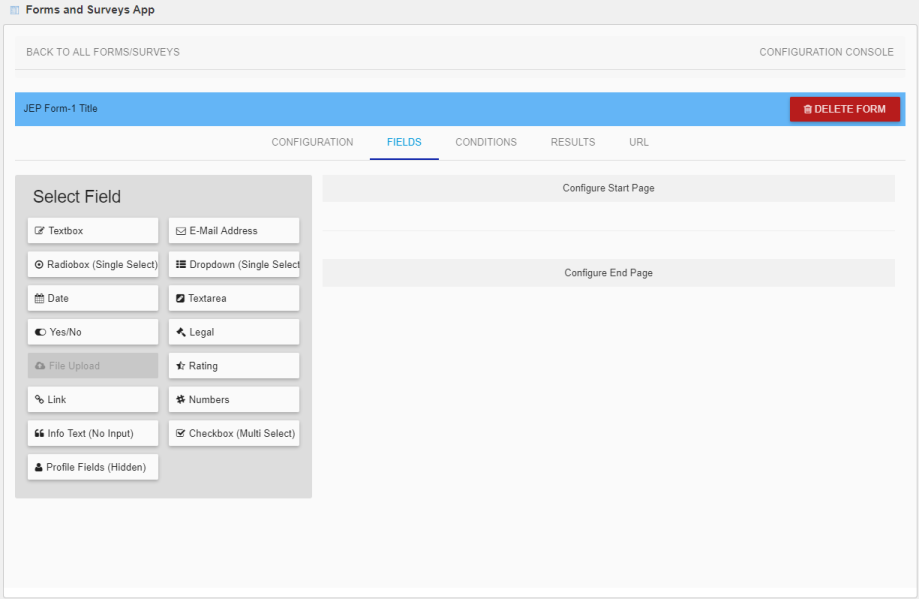
Items under Select Field can be selected as appropriate to set up various input fields on the form.
Table 1. Available Fields Textbox Select to add text inputs fields. Radiobox Select to allow user to pick an option from several options displayed via radio buttons. Use + Add Option to add as many options to be displayed on the form. Date Select if the user is to input a date. Yes/No Select if user is to input either Yes or No. Link Select to accept a URL as input. Info Text Select to allow user to provide free-flow text as input. E-Mail address Select to capture an email address input type. Dropdown Select to allow user to pick an option from several options displayed via a drop-down list. Use + Add Option to add as many drop-drop values to be displayed on the form. Textarea Select to allow user to provide free-flow text within an area frame. Legal Select to allow "I accept/ I don't accept" agreements. Rating Select to facilitate the user to evaluate. Specify Number of Steps as the rating scale and also the Shape of the rating icon. Numbers Input field which accepts numeric values only. Checkbox Select to allow user to pick an option from several options displayed as check-boxes. -
On the Fields tab, click Configure Start Page:
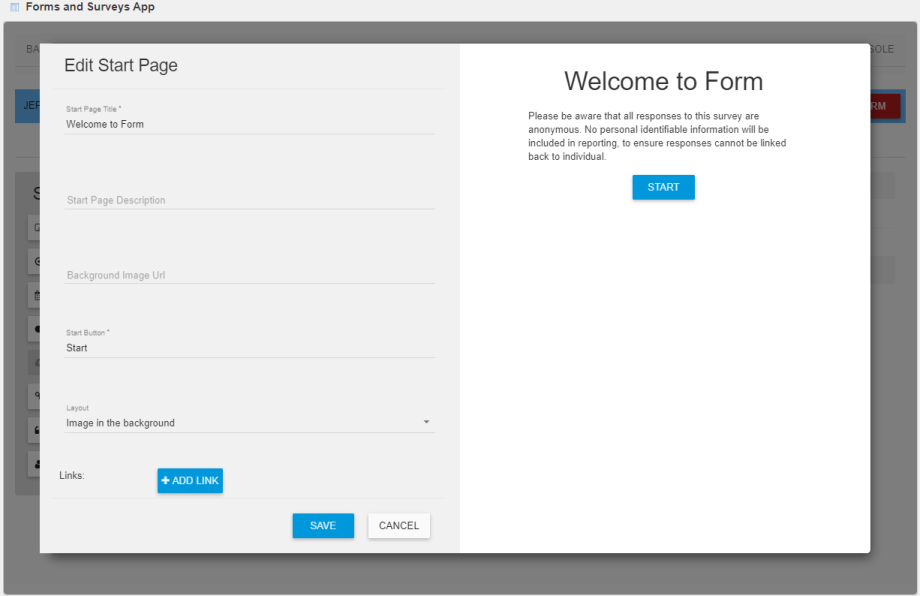
Use the fields available here for displaying a Welcome note to introduce the form to the user. This will be displayed to the user before they can start providing inputs in the form.
-
On the Fields tab, click Configure End Page:
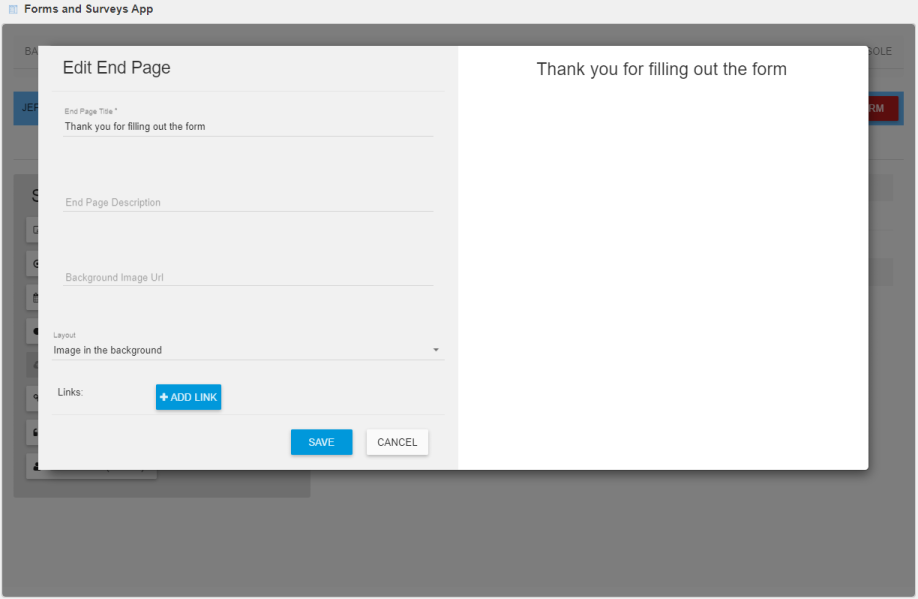
Use the fields available here for displaying a closure note or a thank you message for providing the inputs on the form. This screen will be displayed to the user after successfully submitting the form/survey.
-
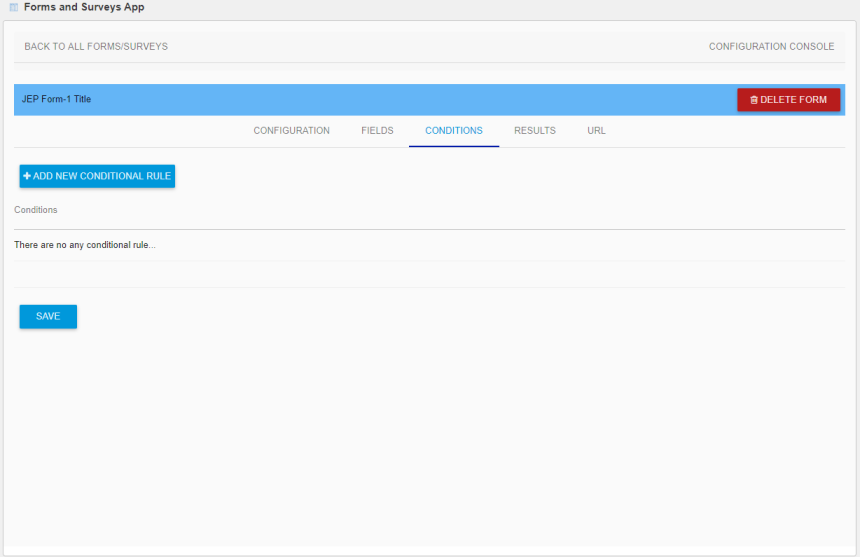
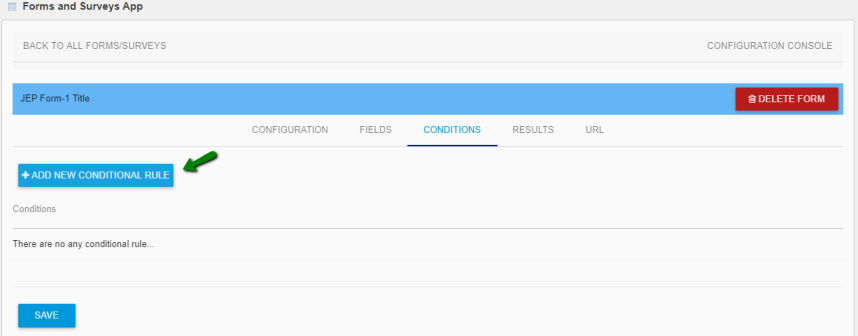
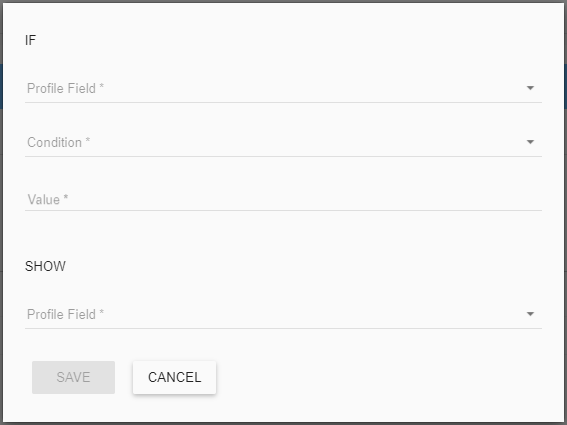
On the Conditions tab, specify conditions to help decide when a field is to be displayed or hidden on the form so as to seek user's inputs selectively.
All fields can be used to build conditions, except Info Text and Checkbox.
Any one of the following Condition parameters can be selected:
- is equal to
- is not equal to
- contains
- does not contain
- ends with
- does not end with
- starts with
- does not start with
Only fields matching the condition will be displayed to the user.
-
Select + Add New Conditional Rule to add several rules.
-
For each condition, specify the condition that should match the value in the form field, based on which one or more form fields are to be displayed.
-
The Results tab displays the results of the data captured after the form has been submitted by the user. Selected or ALL Results can be exported as JSON or
CSV formats. The number of items/page can be customized.

-
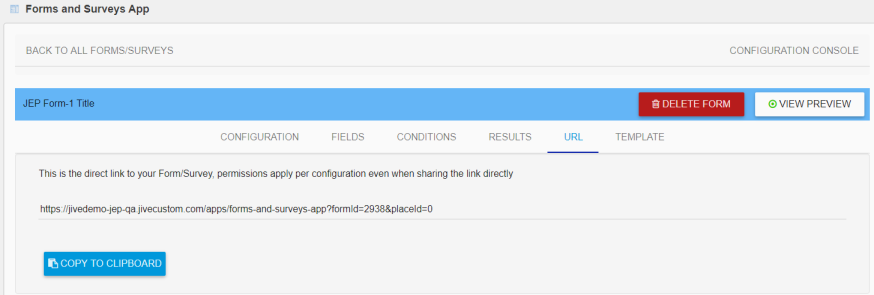
On the URL tab, on creating a form, the URL is automatically created. This link can be copied and used to access the configured form.