Maven: Installing
Here you can find step-by-step instructions for getting Maven up and running to support your development.
Current Maven Version: 2.2.1
You should use this version.
Note: Mac OS X comes pre-installed with a copy of Maven 2.2.1; be sure to double-check your
version from the command line after following the steps below, or things will break.
Step 1: Get the Maven binary
You can download binaries at http://archive.apache.org/dist/maven/binaries/. No other plugins are required.
Step 2: Unpack the Binary on your system
On Mac:
- Explode the zip on your system to
/usr/local.
On Windows:
- Extract the downloaded Maven zip file to the root of the
C:drive, this creates a maven-2.2.1 folder.
Step 3: Set your environment path
On Mac:
- Add a M2_HOME environment variable to your ~/.bash_profile and point it to your
download, for
example:
export M2_HOME=/usr/local/apache-maven-2.2.1 - Add the
$M2_HOME/bindirectory to your path, before/usr/bin.
On Windows:
- Adjust the System Path Variable, appending a semi-colon and the location of the
maven\bin directory as shown in this example as
C:\maven-2.2.1\bin: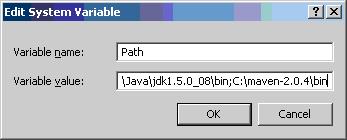
- Add a
M2_HOMEenvironment variable as well. If you want to get fancy, you can define that first and substitute%M2_HOME%\binin the System Path variable.
Step 4: Test your installation
On Mac:
notch:~ gw$ mvn --version
Maven version: 2.2.1
Java version: 1.5.0_13
On Windows:
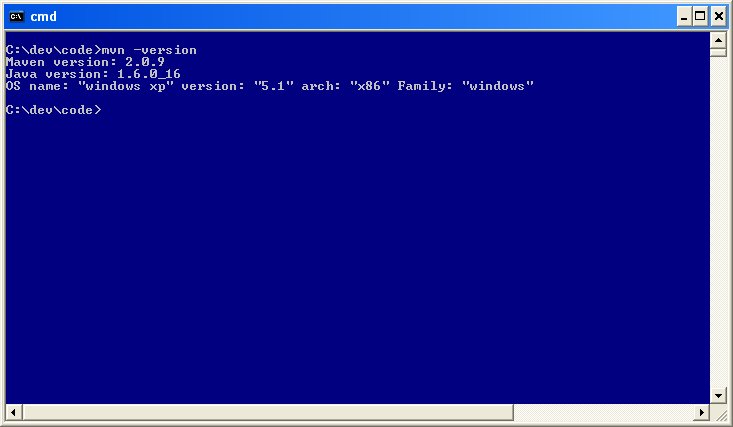
- Open a new command window (the changes to the Path variable will not take effect in command windows opened previously) just as you had done to verify the correct operation of the Java Development Kit in the previous step.
- At the command prompt type:
mvn –version
You should see the response as indicated:
Step 5: Configure your repository settings
- Create a file called settings.xml in your OS user home directory as follows:
- On Mac:
~/.m2 - On Windows:
%APPDATA%\..\.m2(running mvn clean should create this for you in your Documents and Settings folder).
- On Mac:
- Copy the contents from Maven: settings.xml for licensed customers and partners to the settings.xml file and save it.
- Customize the properties to suit your environment. Look
for:
<properties>
 <!-- Defines Tomcat home directory for Cargo -->
 <tomcat.home><![CDATA[/usr/local/apache-tomcat-6.0.14\]\]\></tomcat.home>
 <tomcat6.home><![CDATA[/usr/local/apache-tomcat-6.0.14\]\]\></tomcat6.home>
 <!-- Specifies whether Cargo should stay alive after running integration tests -->
 <cargo.wait>false</cargo.wait>
 <!-- Overrides the value for the <setup> tag in jive_startup.xml -->
 <jive.setup>true</jive.setup>
 <!-- Your SVN credentials>
 <svn.username>yourname</svn.username>
 <svn.password>yourpass</svn.password>
</properties>
Properties defined in the settings.xml file are global and apply to all Maven projects. Properties that may vary from project to project, such as
<jiveHome>, should not be defined here.
Step 6: Add the Crypto JAR files to JDK's lib/security folder
This is required if you are not using the standard RPM (for example, you're developing on Windows). It enables manual license reporting. You can get the jar files from this site.