Setting up user-uploaded avatar moderation
You can have every user-uploaded avatar image added to a moderation queue for approval or rejection.
With this setting enabled, a user uploading an avatar is notified that their avatar choice is pending approval. Once approved, the avatar becomes available for the user to designate it (or others) as their primary avatar. It does not become the user's primary avatar until the user manually selects it after moderator approval.
To enable user-uploaded avatar moderation:
- In the Admin Console, go to .
- Under User Uploaded Avatars, select the Moderate uploaded user avatars check box.
- Click Save Settings.
With the moderation enabled, all user uploaded avatars must pass review before becoming available to users. For more information, see Reviewing user-uploaded avatars.
Reviewing user-uploaded avatars
When you choose to have avatars moderated, a user uploading an avatar is notified by the interface that their avatar choice is pending approval. Once approved, the avatar becomes available for the user to designate it as their primary avatar.
After a user uploads an avatar, the avatar moderation queue becomes available to moderators in the Admin Console.
To review user-uploaded avatars:
- In the Admin Console, go to .
- Click Moderation queue to see the avatars which must be reviewed.

Note: The avatar moderator sees the link only when there are images in the queue waiting to be moderated. - Review every avatar in the list as follows:
- Select Approve to make the avatar available for the user.
- Select Reject to reject the avatar.
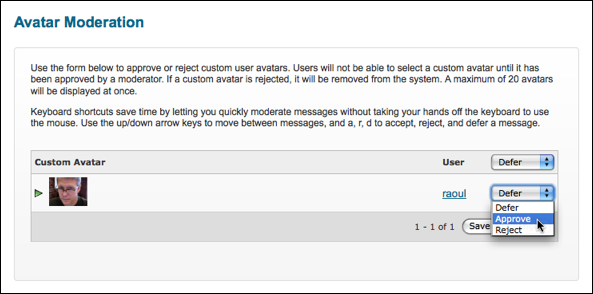
- When you finished reviewing avatars, click Save All Changes to apply the changes.
The approved avatars appear on the user avatar list. It does not become the user's primary avatar until the user manually selects it.
Note that user-uploaded avatars don't appear with the default avatar images on the Avatar Settings page. You can view and, if necessary, delete a user's uploaded avatars as follows:
- In the Admin Console, go to .
- Click the user name in the list to view their summary page.
- Under User Avatars, view and delete their uploaded avatar images.