Testing Teams Status tile
To test the tile, add a new tile with the default settings and verify that it works for the Teams User.
To add the tile to the page:
- Go to a Jive place where you safely add and test a new tile.
- Open the relevant Activity or Custom page and edit it.
- Click Add a tile.
-
Under Categories, select External Add-ons, then select JEP: Teams Status Tile under
Tiles.
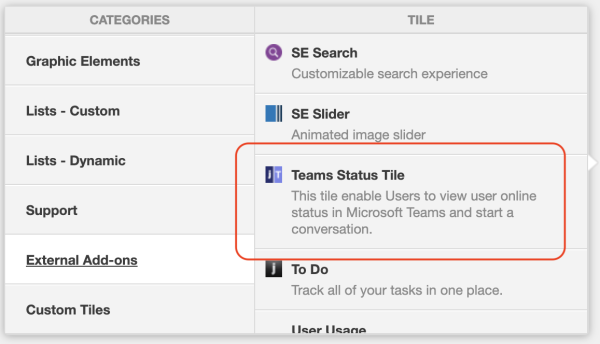
The tile is added to the page.
- Under General Settings, in Title, specify a title for the tile and select the Display tile title check box.
- Click Continue.
-
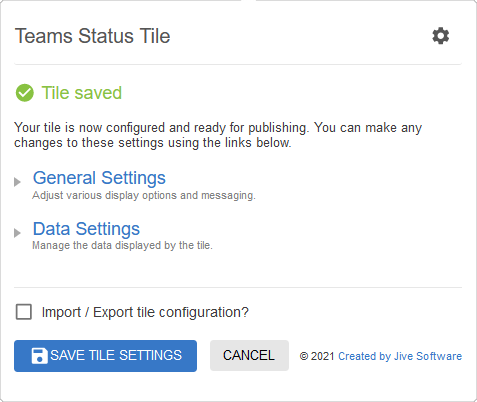
On the Teams Status Tile screen, click the Save Tile Settings button to complete the configuration.
-
Click Save at the bottom of the Activity page to save the changes.
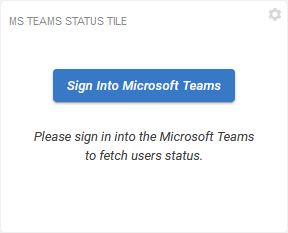
Once the Activity page is saved, the new tile requires signing in to Microsoft Teams:
-
Click on the Sign into Microsoft Teams.
If you haven't authenticated recently with Microsoft Teams, you will be asked to enter your credentials. Once the sign in is confirmed, the tile should display your Microsoft Teams status. The header may look differently based on the status of the actual user.
-
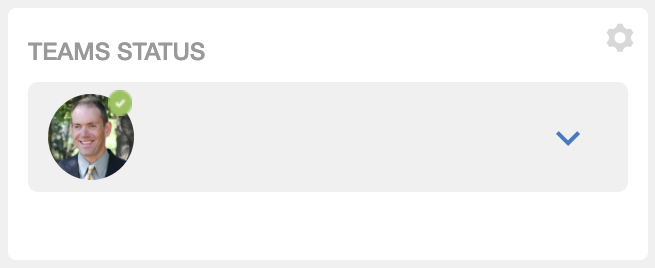
Click on the down arrow to view the list of users.
-
To make sure the user statuses are accurate, reach out to one or more of the people you see in the list and ask them to update their status in Microsoft Teams.
The tile should update within 15 seconds to reflect the update.
- If a user's status in the list is blank, the user's Microsoft Teams username is likely not set in their profile.
- If a user's status is Unknown, the user may not be configured properly in Microsoft Teams.
-
For any user in the list, click Chat on the right. This should initiate a chat session with the user, just like the Teams Chat functionality described in
Testing Teams Chat.
If the Chat button is not shown, the user's Microsoft Teams username is likely not set.