Exporting analytics data
You can export analytics data directly from your community interface by using the Analytics Export service.
With this interface, you can set the filters, and then export the data that meets the specified conditions.
Getting the requested amount of data with filtering conditions applied may take a long time to complete. This may lead to time-outs when you preview or download reports. For relatively small-sized queries – usually, less than 3 months of data for communities with less than 5,000 users – the processing is usually successfully finished and you can see the results immediately.
For large queries – if you want to get data for more than 3 months for a community with than 5,000 users – the processing may take too long and timeout. In this case, for the Preview option, you will not get any results at all; refreshing the page will cancel the request and you will be need to re-configure the filters. But for CSV downloads, the processing continues in the background and you can get the resulting CSV file on the Historical CSVs tab once the processing completes. The CSV files remain available for 48 hours from the time of the request.
To export analytics data:
-
In the user interface, go to .
This opens the DES Explorer page.

-
To add a filter, click
 , click the filtering option you want to add, specify the filtering
condition, and then click Apply.
, click the filtering option you want to add, specify the filtering
condition, and then click Apply.
- To add a match, type the sequence to match in the box and click
 .
. - To configure multiple choice, select the check boxes for the required conditions.
- To set a period, specify the start and end date.
The available filters are listed in List of filters.One of the commonly used filters isactivity.timethat is used to limit the date range of the activity. For more information on the available filters, see List of filters. - To add a match, type the sequence to match in the box and click
-
To remove a filter, click
 on the filter box.
For smaller queries, the filtered data is downloaded in a CSV file immediately; you need only to select a directory where the file should be saved locally. The default output fields are listed in Default CSV output fields.
If the query is too large for instant download, a warning is displayed with the name of the CSV file that will be generated per your request.
Figure: An example of a warning about a large query

The CSV will be built and archived by using the gzip compression algorithm in the background. You should download it later from the Historical CSVs tab. The archives are available for 48 hours. You can use any commonly used archive manager, like WinZip or 7-zip, to unzip and further use the CSVs.
Figure: A report example on the Historical CSVs tab
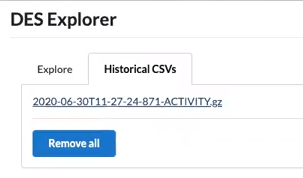
After you download the reports you require, you can clear the Historical CSVs list by clicking Remove all.